Get the most out of your subscription.
Take advantage of all the features included with your SecureAnywhere® protection.
Set Up Your Webroot Account Today
The easiest way to manage security for your devices, whether you have one machine or several, is at your fingertips. Access protection information and cloud-based features from any computer—anywhere.
It's easy to get started
- VIsit my.webrootanywhere.com or click Access Web Console via your Webroot software.
- Enter your login information.
- Create a security code using a combination of six letters, numbers, and special characters.
- Create a security question and click Register Now.
- Confirm your email by clicking the link sent to your inbox.
- Confirm your registration.
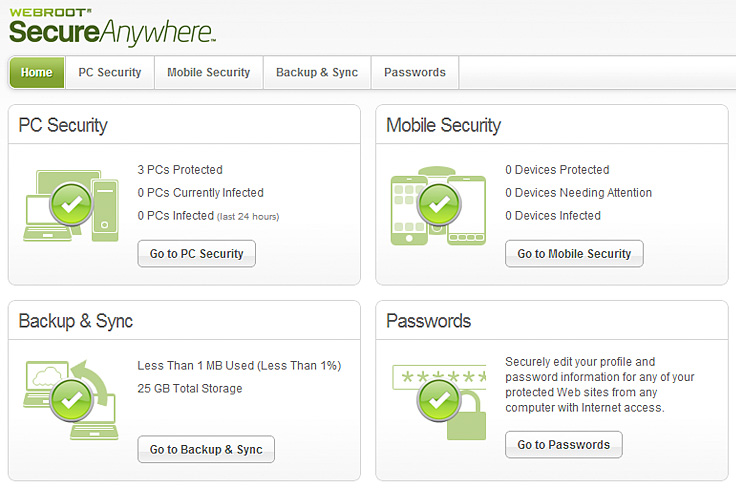
You can now view protection information, set up mobile devices, send commands, and manage features.
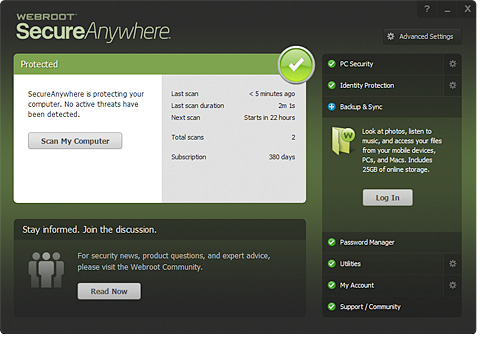
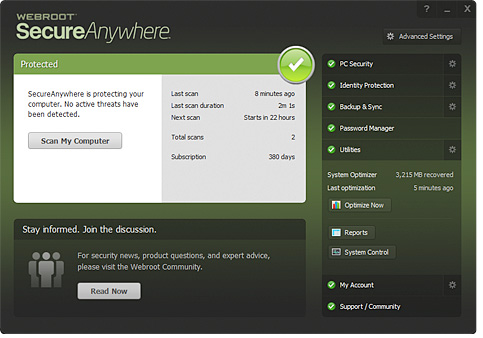
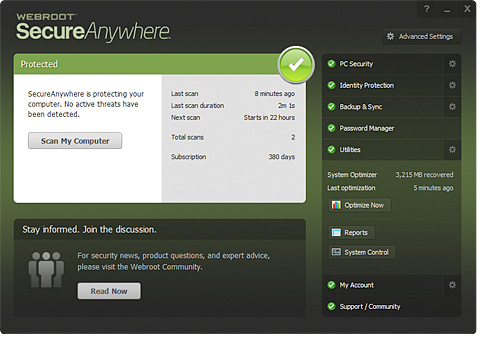
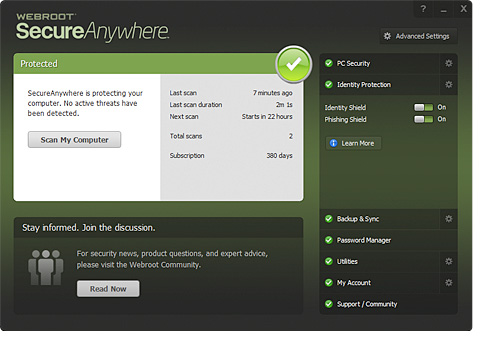
Here's an example of what you'll see when you log in:
Password Manager is included with Webroot SecureAnywhere® Internet Security Plus and Internet Security Complete. If you're using a different SecureAnywhere product and would like to access this feature, click Upgrade Now.
Password Manager
Password Manager protects your login credentials and helps prevent your accounts from being hacked. One click securely logs you in to all your sites, and provides simple access for tablets, smartphones, and computers.
“Passwords and login info is no longer a problem to remember for me, and I feel so much better knowing [Webroot] has my back.” - Webroot Customer: instacat
It's easy to get started
1. If you have already created your Webroot account, skip ahead to Step 2.
If you have not yet created your Webroot account, open SecureAnywhere, click Manage Passwords and follow the prompts to create your account. For more information, click here.
2. Open Internet Explorer, Chrome, Firefox, or Safari, and click on the Webroot toolbar icon.
3. When prompted, enter your Webroot account credentials. Now, any time you log in to a website, Webroot will offer to remember the password. Just click Save Site, and you won't have to enter that password again.

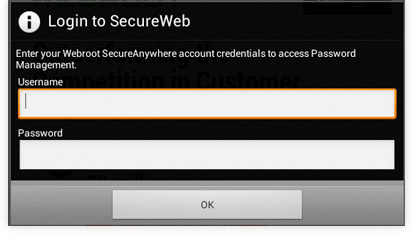
Manage passwords on your Android devices
1. To begin, visit Webroot SecureWeb in the Google Play store.
2. Click the green Install button.

3. Click Sign in, then enter your Google Account credentials which you use to download apps from Google Play.
4. Choose your device from the dropdown menu, and click Install.

5. The Webroot® SecureWeb browser app will be automatically downloaded on your Android device. Using the Webroot SecureWeb app as your internet browser will enable you to manage passwords, and it will protect you from online threats.
6. Using your Android device, open the SecureWeb app and tap Accept on the license agreement screen.
7. Tap the key icon.
8. Enter your Webroot Account credentials and tap ok.
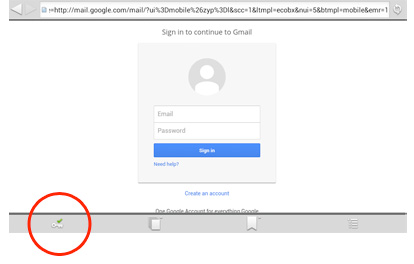
9. When you visit one of your saved sites, tap the key icon.
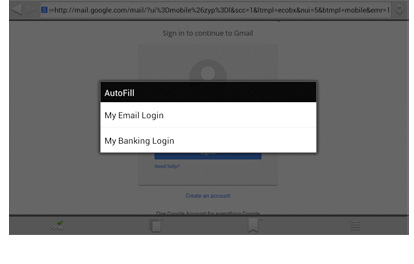
10. Tap AutoFill, then choose which of your stored credentials you'd like to use. The username and password are filled in automatically.
Two-Factor Authentication (2FA)
Two-factor authentication (2FA) is a type of extra account security included with your Webroot management account. It helps make sure that, when you log in, you're really you.
Webroot has incorporated two-factor authentication, or 2FA, into the login process for the Webroot management console.
-
Visit my.webrootanywhere.com and log in. You will see an option to Set up 2FA. If you choose to skip this process, you can always complete it later from within your console.
-
Simply choose your desired Authenticator app and download it to your device.
-
Use the app to generate a 6-digit passcode.
-
Enter it into the setup window in your console, then click Verify Code.
The next time you log in to your management account, instead of using your previous Webroot security code, you’ll be asked for a limited time passcode from the authentication app you chose. You have now set up 2FA security for your account.
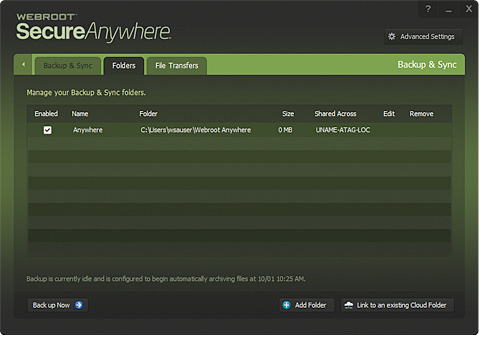
Backup & Sync is included with Webroot SecureAnywhere® Internet Security Complete. If you're using a different SecureAnywhere product and would like to access this feature, click Upgrade Now.
Backup & Sync
Keep your photos, documents, music, and videos safe from computer crashes and data loss. Access your files anywhere, from any device. Files backed up to the Webroot cloud are secured with the highest level encryption possible.
It's easy to get started
1. Open SecureAnywhere, click Backup & Sync, then click Log In.
Click Log In.
2. Enter your login credentials and click Log In.
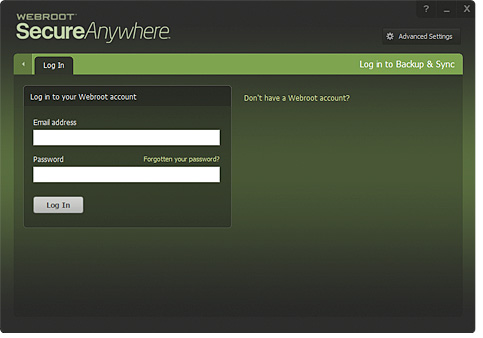
If you have not yet created your Webroot account, click Don't have a Webroot Account? to get started. For more information on creating your account, click here.
3. After logging in, click Folders.
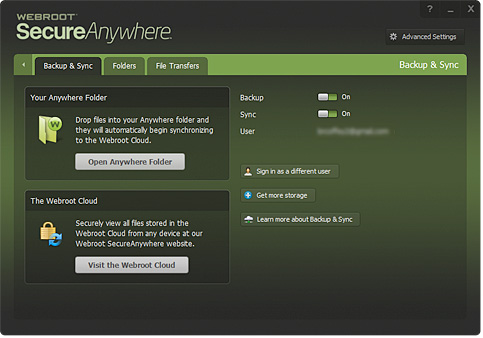
4. Click Add Folder and select the folders from your computer that you want to back up. The selected folders will be backed up automatically.
click Add Folder.
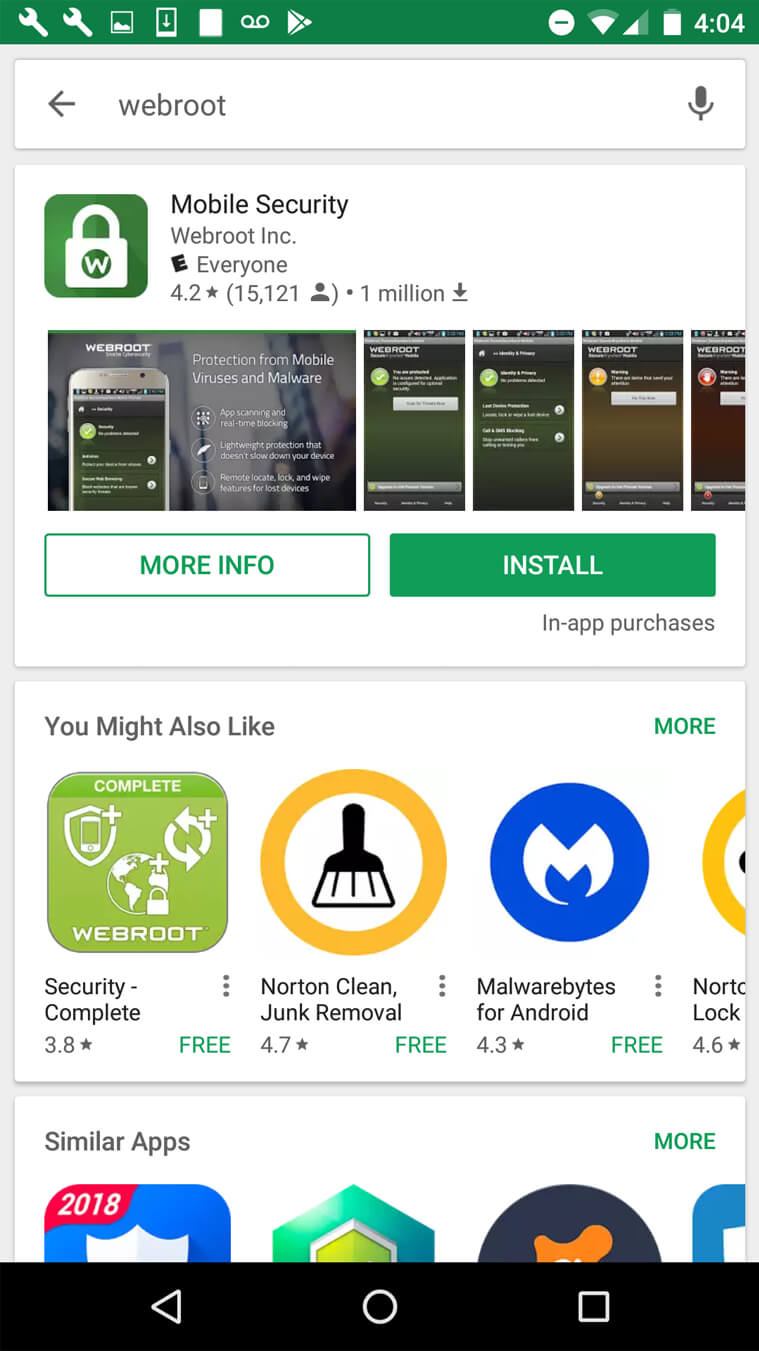
Android™ Protection is included with Webroot SecureAnywhere® Internet Security Plus and Internet Security Complete. If you're using a different SecureAnywhere product and would like to access this feature, click Upgrade Now.
Android Protection
Webroot protects your personal data and identity when browsing, shopping, banking and sharing online from your Android™ devices.
1. On your Android™ device, open the Play Store and search "Webroot".
2. Look for the "Mobile Security" app and tap the green "Install" button.
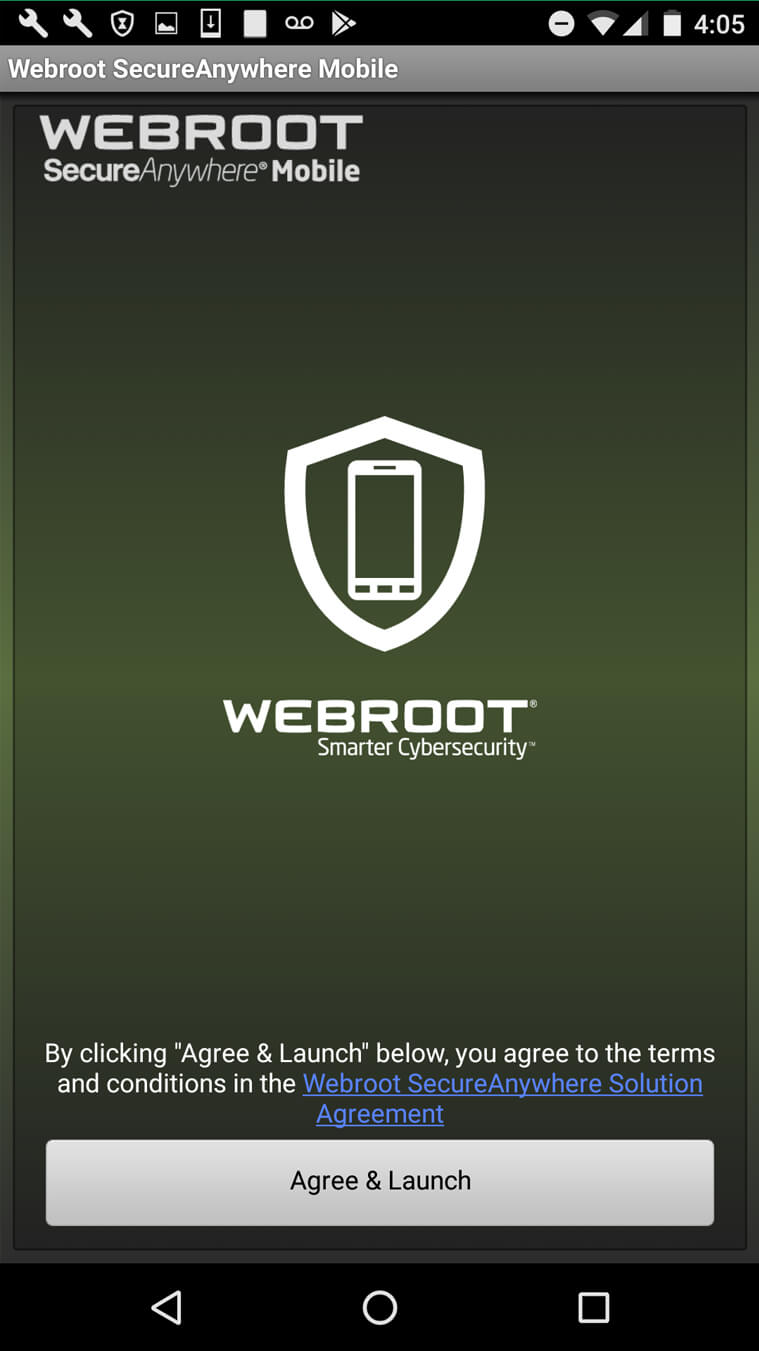
3. Once the app is installed, open it and tap the “Agree & Launch” button.
4. Next, tap the “Activate” button.
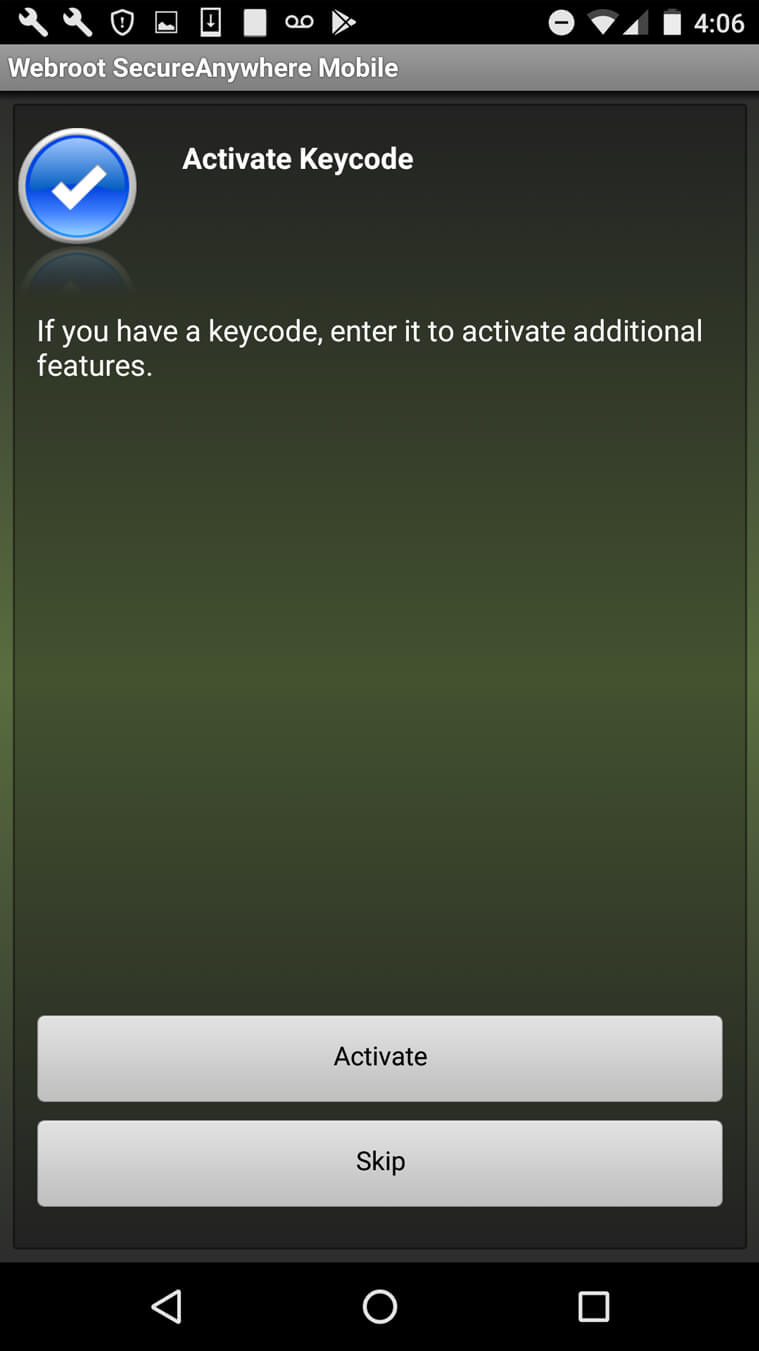
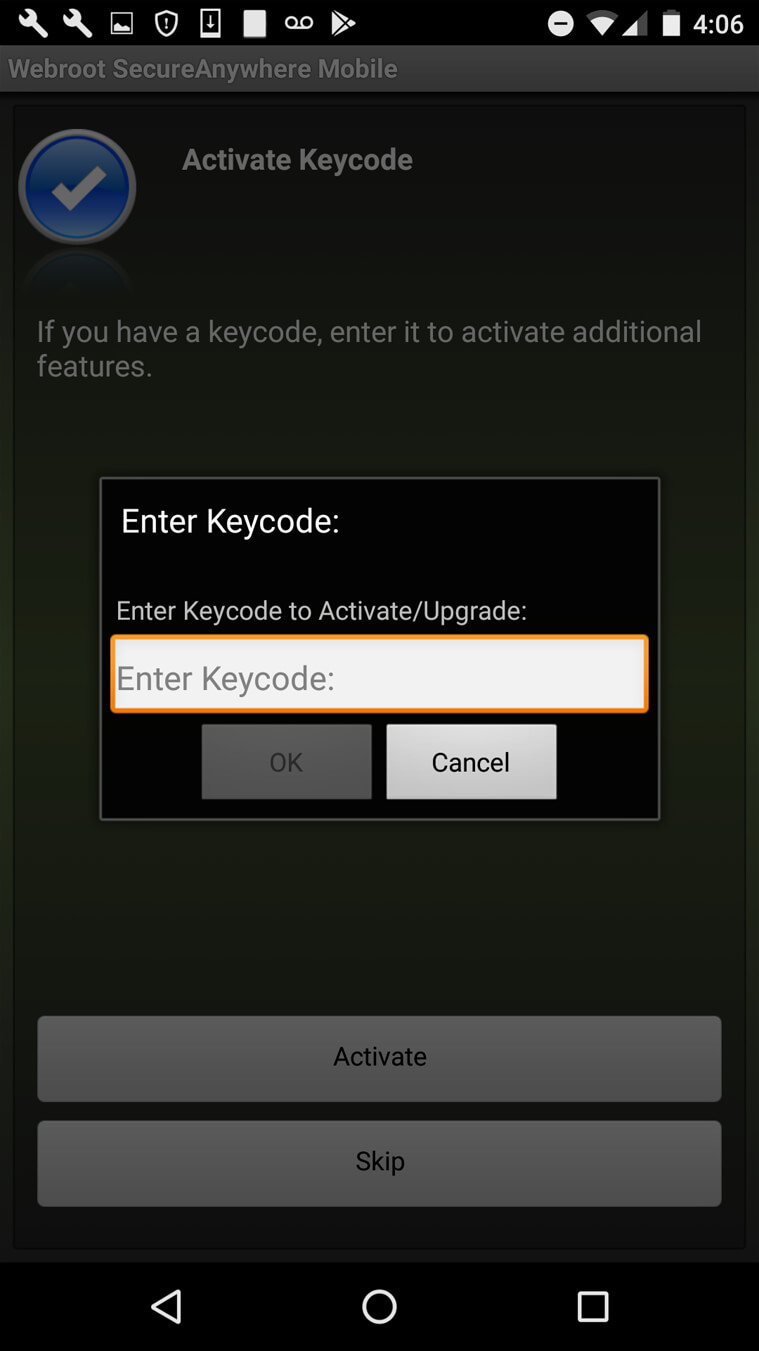
5. Enter your keycode, then tap "OK".
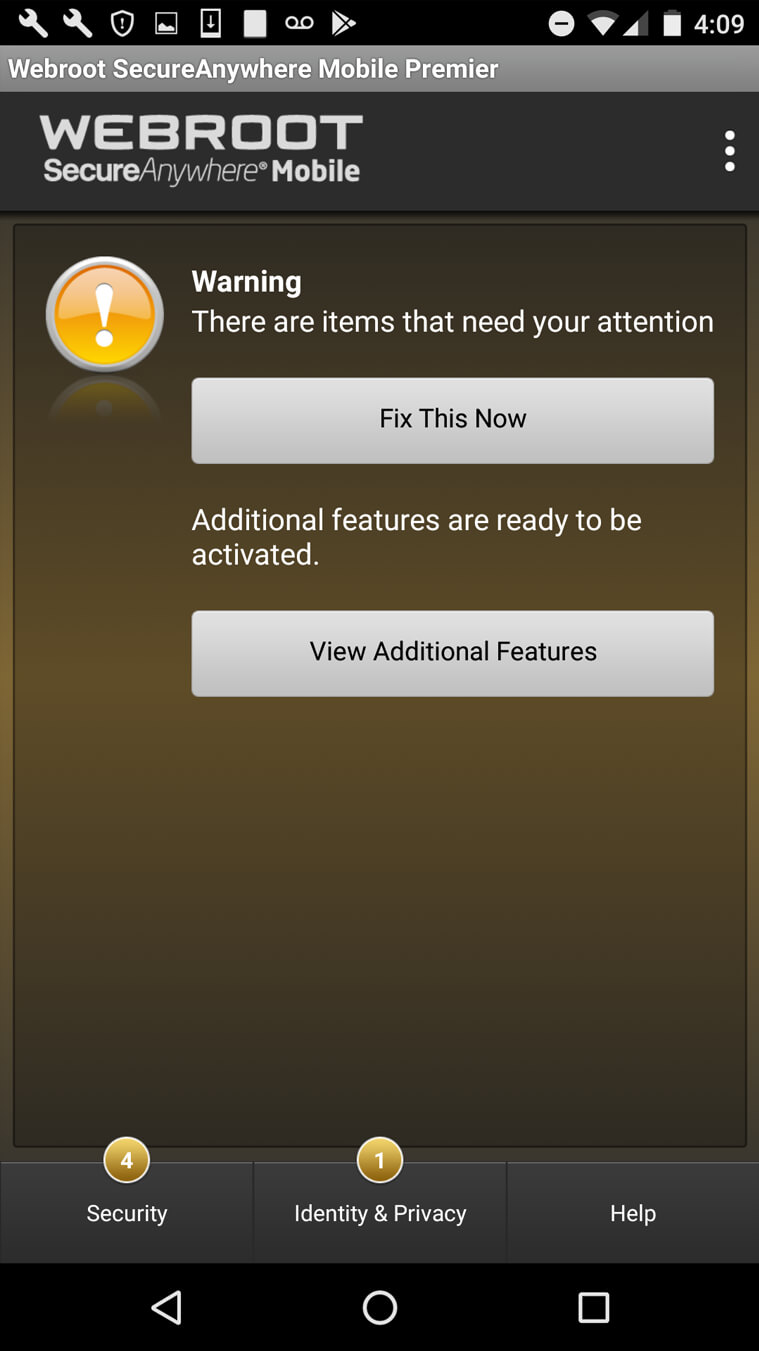
6. If there are items that need your attention, tap “Fix This Now” and follow any prompts on the screen to resolve the issues. These issues may vary, depending on your device and configuration.
The System Optimizer is included with Webroot SecureAnywhere® Internet Security Complete. If you're using a different SecureAnywhere product and would like to access this feature, click Upgrade Now.
System Optimizer
System Optimizer protects your privacy by wiping away traces of your online activity, as well as files that show your computer use. Reclaim hard drive space by eliminating browser cache, cookies, and temporary files.
To get started, open Webroot SecureAnywhere, click Utilities, then click System Control.
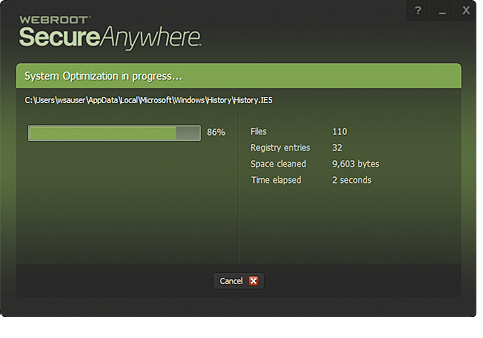
System Optimizer will now scan for and erase unneeded files.
To access more options and settings, click the gear icon next to Utilities
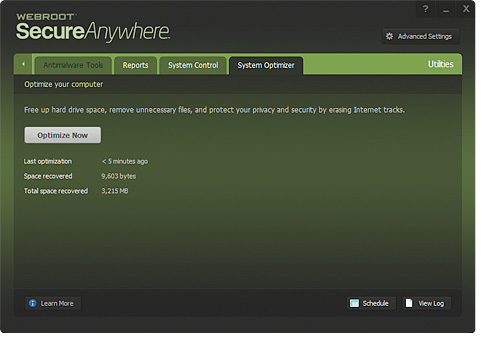
Click Schedule if you want System Optimizer to run automatically at certain times.
The System Optimizer Scheduler is included with Webroot SecureAnywhere® Internet Security Complete. If you're using a different SecureAnywhere product and would like to access this feature, click Upgrade Now.
System Optimizer Scheduler
The System Optimizer Scheduler lets you schedule when the System Optimizer runs on your devices to wipe away traces of your online activity and reclaim hard drive space by removing your browser cache, cookies, and temporary files.
To adjust settings, click advanced settings from the top right of the home screen of your Webroot console. From there, select "schedule" on the top left navigation.
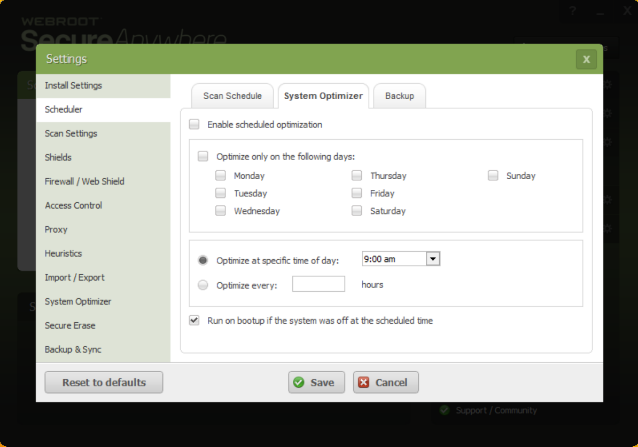
Click the "System Optimizer" tab. Enable and customize optimization schedule based on preferences.
The System Analyzer is included with Webroot SecureAnywhere® Internet Security Complete. If you're using a different SecureAnywhere product and would like to access this feature, click Upgrade Now.
System Analyzer
System Analyzer scans for threats, security vulnerabilities, and other details about your computer, including critical OS, hardware and software information. This way, you can spot potential risks and security gaps before they become a problem, as well as identify causes for system slowness.
To get started, open Webroot SecureAnywhere, click Utilities, then click System Control.
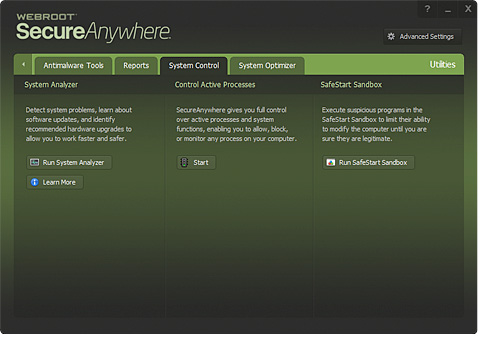
Click Run System Analyzer.
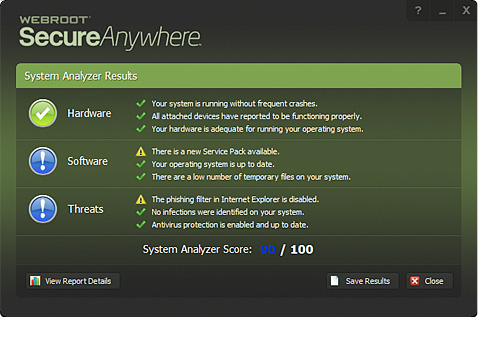
After the analysis is complete, System Analyzer provides you with a report and recommendations.
Identity Shield
The Identity Shield secures your browsing sessions against Trojans, phishing attacks, and identity theft. It ensures that your personal information—such as usernames, passwords, security codes, account numbers, and credit card numbers—stays protected as you work, share, bank, shop, and interact online.
To access more options and settings, click the gear icon next to Identity Protection.
By default, the Identity Shield is always on and automatically protects HTTPS sites and social networks. When the Identity Shield is actively protecting your browsing session, you notice a lock on your Webroot system tray icon. 
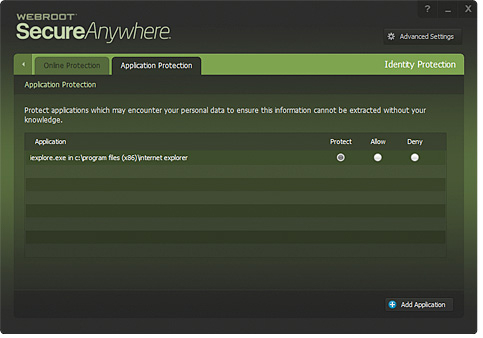
Click Application Protection, then click Add Application to customize.
Phishing Shield
The Phishing Shield identifies and blocks fake websites that trick you into entering your personal information. As you browse, URLs are evaluated in real time for phishing risk. Analysis includes looking at page content, domain reputation and numerous other factors.

The Phishing Shield is on by default. We recommend you leave it on for maximum protection.
Realtime Shield
The Realtime Shield blocks threats that are listed in the Webroot® Intelligence Network and in our community database. If the shield identifies a known threat, it immediately blocks and quarantines the item before it causes damage to your computer or steals your information. If it detects a suspicious file, SecureAnywhere opens an alert and prompts you to block or allow the item.
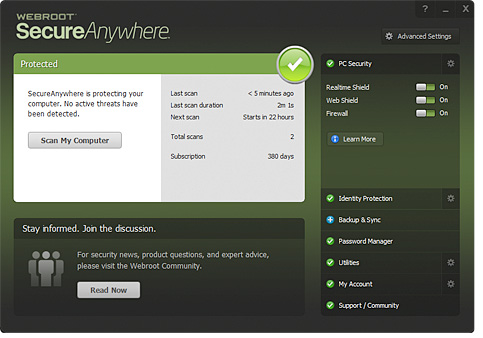
By default, the Realtime Shield will be on and pre-configured with the recommended settings.
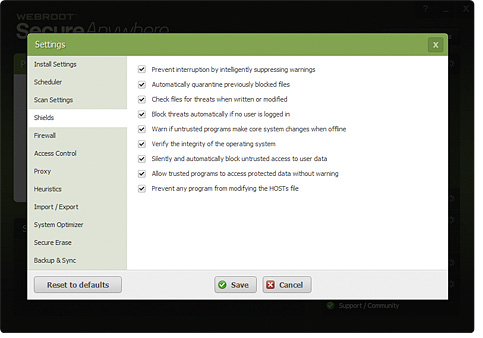
To adjust settings, click Advanced Settings in the upper right corner of the home screen, then click Shields. Detailed shield definitions can be found in the User Guide.
Firewall/Web Shield
The Firewall monitors data traffic traveling out of your computer. It looks for untrusted processes that try to connect to the Internet and steal your personal information. The Web Shield alerts you to websites that may pose a threat as you browse. Likewise, when you use a search engine, the Web Shield analyzes the search results and displays an image next to each link, letting you know whether it's a trusted site or a potential risk. By working along with the Windows firewall, your network has both inbound and outbound protection.
From the main screen, both Firewall and Web Shield can be accessed under PC Security, and will be on and pre-configured with the recommended settings.
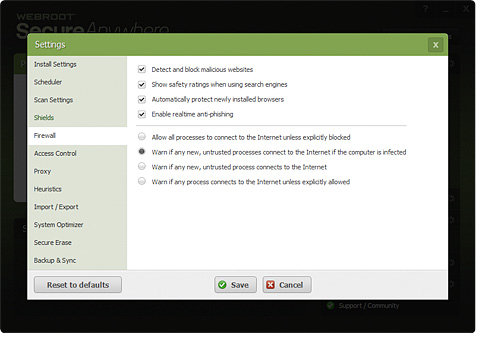
To adjust settings, click Advanced Settings in the upper right corner of the home screen, then click Firewall.
Quarantine
Once items are moved to the Quarantine, they are disabled and cannot harm your computer. However, you may want to delete or restore quarantined items in some circumstances:
- If you want to conserve disk space, you can delete items permanently
- You cannot restore items once permanently deleted from quarantine
- If a program is not working correctly without a quarantined item, you may choose to restore it
To view the quarantine, click the gear icon next to PC Security, then click Quarantine. If you have files in the Quarantine, you can select a file and click either Delete Permanently or Restore.
To view the quarantine, click the gear icon next to PC Security, then click Quarantine.

If you have files in the Quarantine, you can select a file and click either Delete Permanently or Restore.
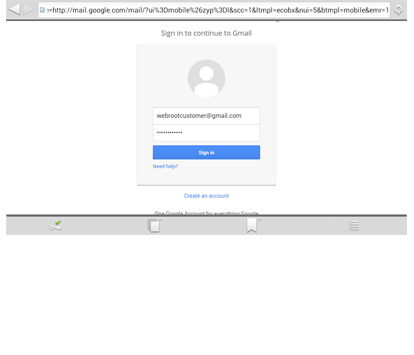
SecureWeb iOS® Protection
Specifically designed for iPad® and iPhone® devices, the Webroot® SecureWeb™ browser protects you from phishing attacks and infected sites as you surf the web.
It's easy to get started.
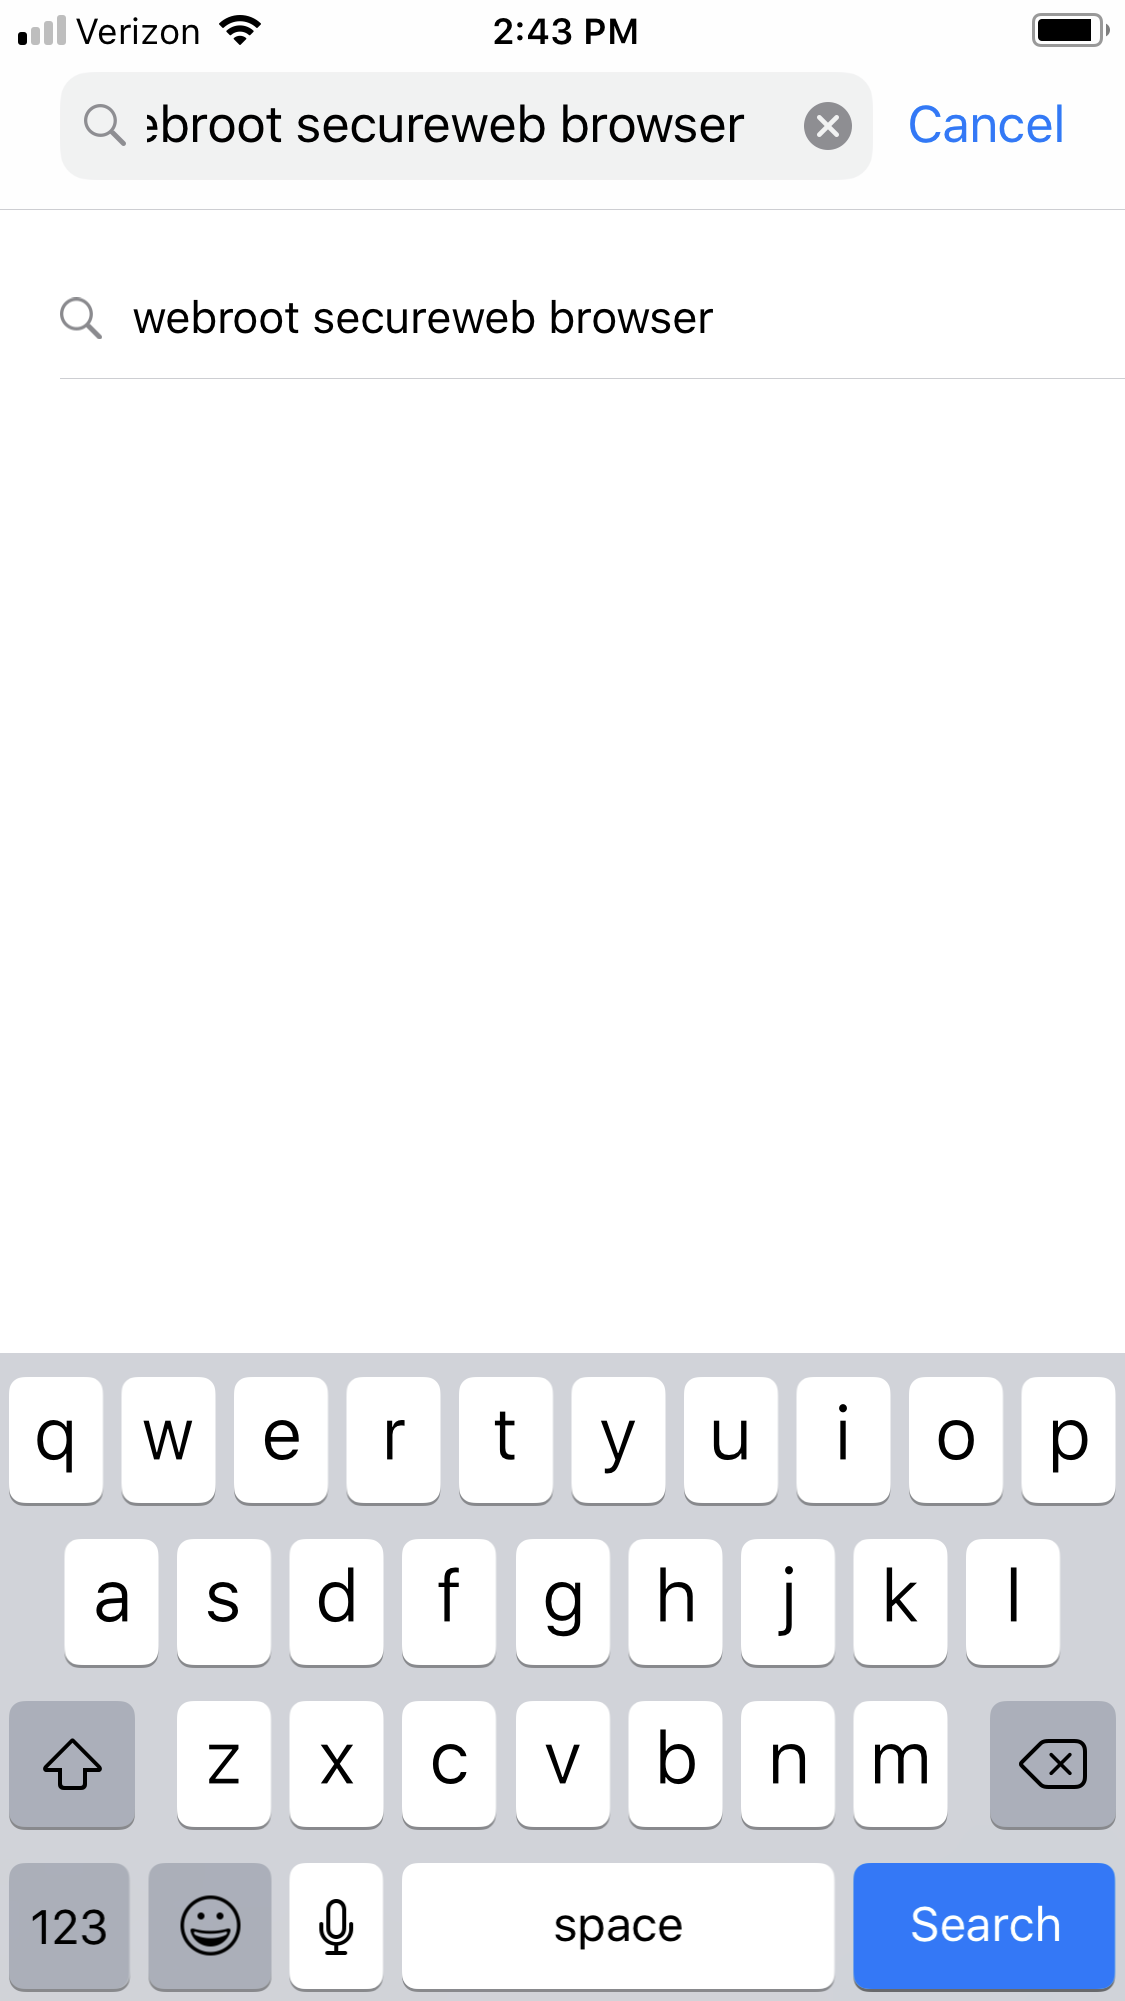
1. Open the App Store on your iOS device and search for "Webroot SecureWeb Browser."
2. Tap the download button.
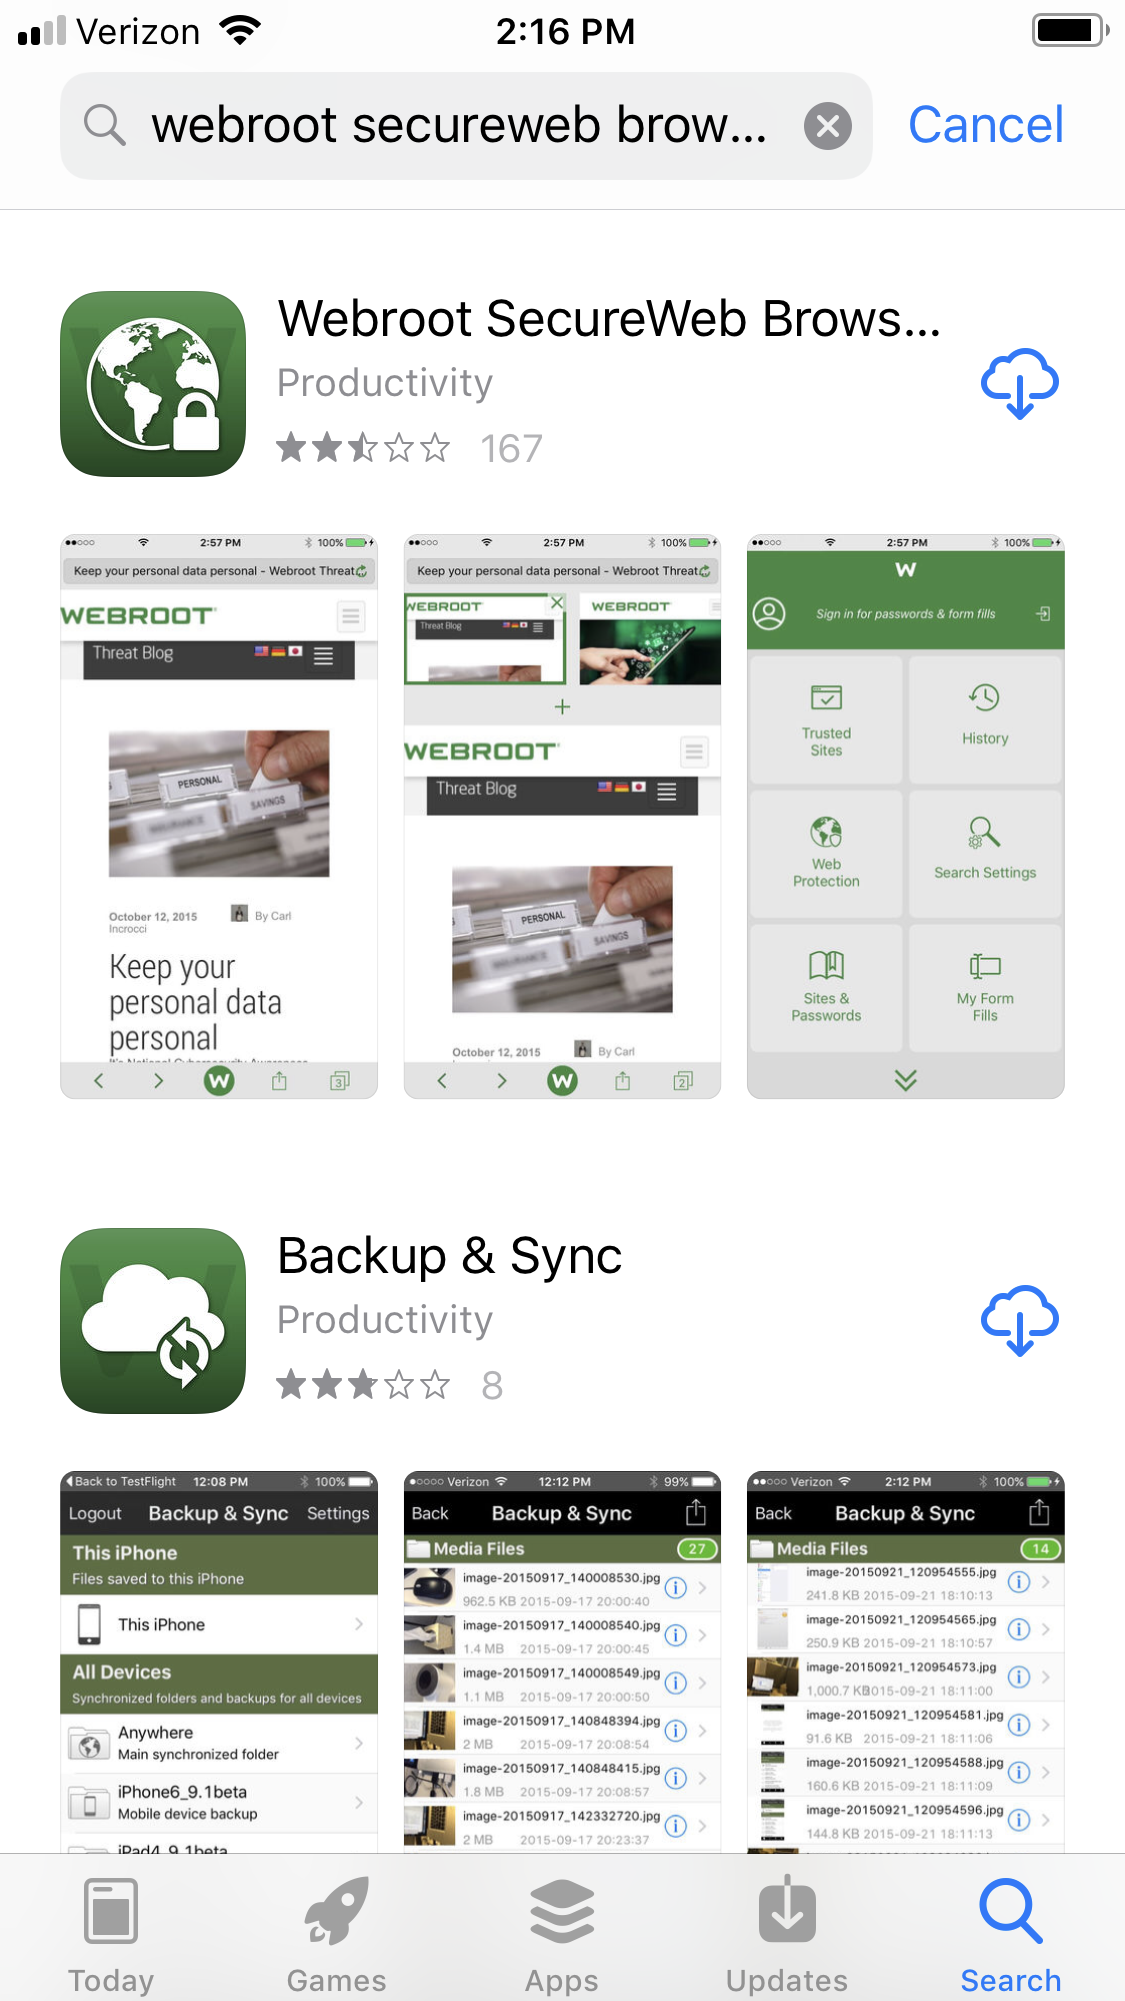
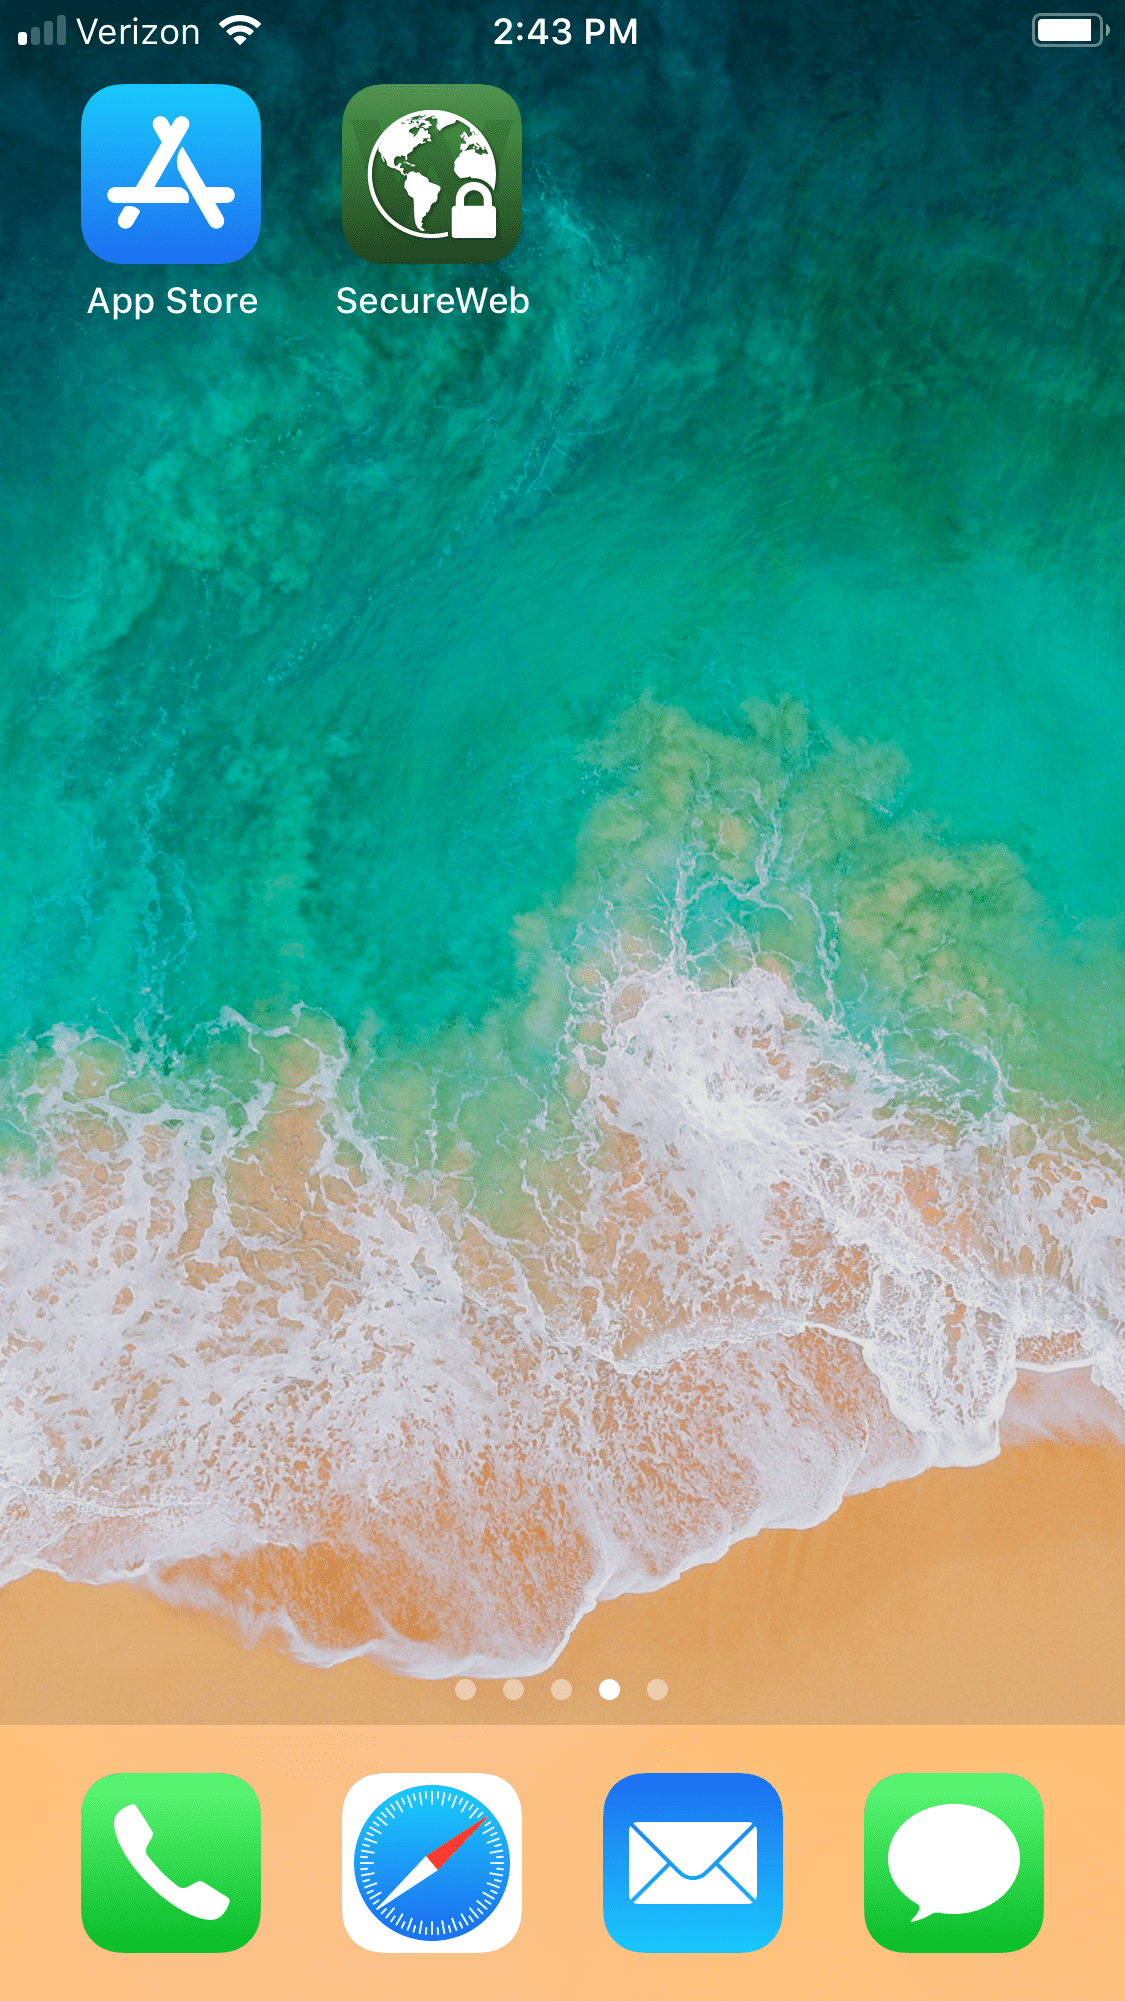
3. Once installed, tap the SecureWeb Browser icon to launch the app.
We recommend using the SecureWeb browser whenever you browse, shop, or bank online. Enter a website address to begin browsing.